How to clean your outboard cowling and engine bay safely
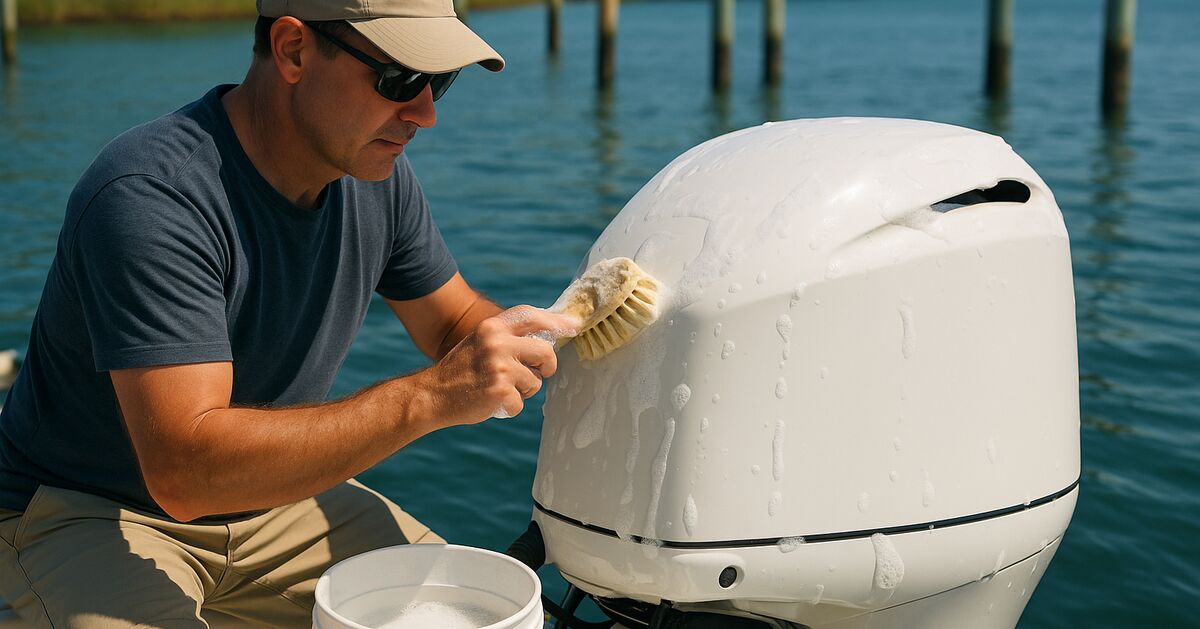
Salt air finds every gap, and nowhere on your boat collects more of it than the outboard motor. One season of neglected cowling and engine bay maintenance in Sarasota's climate can mean corroded electrical connectors, seized fasteners, and a warranty dispute you really don't want to have. The good news is that cleaning this area properly is straightforward once you understand what you're actually trying to protect and why each step matters.
Why the outboard is the one area most owners neglect
Walk the docks at any marina from Longboat Key down to Venice and you'll see gorgeous hulls sitting on lifts, freshly waxed topsides gleaming in the afternoon sun, and outboard motors that look like they spent the winter at the bottom of the bay. The cowling is faded, the lower unit is fuzzy with oxidation, and the tilt mechanism is wearing a permanent rust stain. It's understandable. Most boat owners focus on what they can see from the cockpit, and the motor is just sort of "back there."
The problem is that the outboard is also the most mechanically complex part of the boat, and Southwest Florida is one of the harshest environments on earth for mechanical components. Salt spray, fish slime, sunscreen, fuel vapor, oil mist, and ozone from the nearby Gulf all land on and inside your motor. When you ignore cleaning, those substances don't just sit there looking ugly. Salt crystals wick moisture against metal surfaces and accelerate galvanic corrosion. Oil mist traps heat. Grime hides cracks and weeping seals that you'd otherwise catch early.
Keeping the engine bay clean is also, genuinely, a warranty issue. Most major outboard manufacturers (Yamaha, Mercury, Honda, Suzuki, Evinrude legacy owners) include language in their warranty documentation about proper maintenance. While simply washing a motor won't void a warranty, using a pressure washer incorrectly absolutely can create conditions, such as water-infiltrated connectors or stripped wiring insulation, that give a dealer grounds to deny a claim. We'll cover exactly how to avoid that.
What you need before you start
You don't need a lot of gear, but using the right products matters more here than almost anywhere else on the boat.
- A bucket of warm fresh water and mild boat soap. Simple and inexpensive pH-neutral boat wash works perfectly for the cowling exterior. Do not use household degreasers or citrus-based cleaners unless the product specifically says it is safe for marine plastics and painted surfaces.
- Engine degreaser rated for marine use. Products like Meguiar's Marine Power Cleaner or CRC Marine Heavy Duty Cleaner are formulated to cut through oil and fuel residue without being so aggressive they attack wire insulation or gasket material.
- A selection of soft brushes. A large soft-bristle brush for the cowling face, a medium detail brush for vents and seams, and a small parts-cleaning brush for the lower unit and cavitation plate area.
- Microfiber cloths and shop towels. Microfiber for the painted/gel cowling surfaces, shop towels for greasy areas.
- Corrosion inhibitor spray. This is non-negotiable in our area. Products like Boeshield T-9, CRC 6-56 Marine, or Yamaha's own Stor-Ator are designed to displace moisture and leave a protective film on metal and electrical connection points. This step is what separates a cleaned motor from a protected motor.
- Plastic/vinyl protectant. A UV-blocking protectant (303 Aerospace Protectant is a favorite) applied to the cowling exterior prevents the chalky fade that makes many older motors look worse than they are.
- Low-pressure garden hose with adjustable nozzle. More on this in a moment.
How to clean the cowling exterior
The cowling on modern outboards is typically made from impact-modified polypropylene or ABS plastic with a painted or textured finish. It is tough but not indestructible, and it lives in full UV exposure year-round here in Southwest Florida.
Start with the motor off and cool. If you ran the boat, give the motor at least 20 to 30 minutes before cleaning.
Rinse the cowling with a gentle stream from your garden hose. Keep the nozzle in a wide fan pattern and the tip at least 18 inches from the surface. You are not trying to blast anything off; you're just wetting the surface and loosening loose salt crystals.
Apply your boat wash solution with a soft sponge or wash mitt, working from the top down. Pay attention to the ventilation louvers along the sides of the cowling. Salt and debris pack into those slots and stay damp, which speeds corrosion of the aluminum beneath. Use your detail brush here and work in short strokes to pull debris out rather than pushing it deeper in.
Rinse thoroughly, again from the top down, with a gentle flow. Dry with a microfiber cloth rather than letting it air-dry. In Sarasota's humidity, air-drying tends to leave water spots and can leave a light salt film if your hose water isn't perfectly fresh.
Once the surface is dry, apply a UV-blocking plastic protectant according to its directions. If the cowling has significant oxidation or fading already, you may want to address that first. The process is similar to what we describe for faded gelcoat in our guide on how to get rid of waterline stains on a boat hull in Sarasota, where surface preparation before applying any protectant makes all the difference.
Removing the cowling to clean the engine bay
This is the step most DIY articles skip because it feels intimidating, but you absolutely should remove the cowling at least a few times a year, especially after rough offshore trips or heavy weather.
Removing the cowling on virtually every modern outboard is simple. There is a latch or a set of clips, usually at the front and rear of the motor. Release them, tilt the cowling forward or lift it off, and set it somewhere clean and dry. Consult your owner's manual for the specific procedure on your motor; it takes about 60 seconds.
With the cowling off, you can see exactly what you're working with. Take a moment to just look before you do anything. Look for:
- Oil stains or fuel residue on the block surface
- White or green powdery deposits on wiring harness connectors
- Cracked or chafed wiring insulation
- Rust staining around the powerhead or fuel system components
- Debris (insects, leaves, dried baitfish) that shouldn't be there
Anything you find is information. Address it now rather than discovering it at the boat ramp.
Cleaning inside the engine bay without damaging electrical components
This is where people get into trouble, so let's be specific.
Do not use a pressure washer inside the engine bay. Ever. A pressure washer pushes water past seals, into connectors, and under protective boots on wiring that were never designed to keep out high-pressure water. A gentle garden hose is acceptable in some circumstances, but even then it should be used very carefully and the water stream should never be directed at connectors, sensors, the ECU (electronic control unit), the alternator, or the fuse block.
The better approach for most engine bay cleaning is a combination of targeted degreaser application and wiping rather than rinsing.
Step 1: Protect the electrical components first. Before you spray anything, cover the ECU, all visible wiring harness connectors, the fuse block, and any sensors with plastic bags or plastic wrap secured with a rubber band. Yes, this feels fussy. Do it anyway. You can also use a light mist of corrosion inhibitor over connectors before cleaning, which helps keep moisture from migrating in.
Step 2: Apply marine-grade engine degreaser to oily or grimy areas only. Spray it onto the block, the powerhead surfaces, and the underside of the cowling where oil mist accumulates. Let it dwell for the time the product recommends, typically two to five minutes. Do not spray degreaser broadly or let it run into electrical areas.
Step 3: Agitate with a brush and wipe off. Use your medium detail brush to work the degreaser across contaminated surfaces, then wipe with a shop towel. For stubborn oil baked onto exhaust cover areas, a second application may be needed. You are not trying to get the motor to look brand new inside; you are removing the accumulations that trap moisture and heat.
Step 4: Rinse carefully if needed. If you do use a garden hose for a light rinse, use a very gentle fan spray, keep it well away from covered electrical components, and tilt the motor to its lowest trim position so water drains out and away from the powerhead. Immediately dry accessible surfaces with a shop towel.
Step 5: Remove protective coverings and inspect connectors. Check each connector for moisture. If any got damp, use a can of compressed air to blow them out gently, then apply a small amount of corrosion inhibitor spray to the exterior of the connector.
Step 6: Apply corrosion inhibitor broadly. This is the most important protective step you'll take. With the engine bay clean and dry, mist the entire interior with your marine corrosion inhibitor, paying special attention to any bare metal surfaces, the wiring harness, and all connectors. This product displaces any residual moisture and leaves a protective film that slows the galvanic and crevice corrosion that is so aggressive in our coastal environment. If you own a boat that spends time on the water around Osprey, Nokomis, or Casey Key, where the intercoastal and Gulf waters interact, you are dealing with particularly corrosive brackish conditions, and this step is worth doing every month.
The lower unit and cavitation plate
Don't stop at the cowling. The lower unit takes as much abuse as any part of the motor and is often completely ignored at cleaning time.
Rinse the lower unit after every trip. Fresh water, garden hose, simple as that. Salt crystals that sit on the zinc anodes, the prop shaft, and the gear case housing do real damage over weeks and months.
Every few months, clean the lower unit with the same mild boat soap and a brush, working around the prop shaft, the zinc anodes, and the water intake screens. Check the intake screens for debris while you're there. A partial blockage of the water intake is one of the most common causes of overheating in outboards used in shallow grass flats areas like those around Siesta Key and the inshore waters south of Venice.
Do not paint, coat, or apply anything to the zinc anodes. Their job is to corrode sacrificially so the aluminum around them doesn't. Coating them prevents them from doing that job.
How often should you do this?
For boats used regularly in our area, a full clean including cowling removal and engine bay treatment makes sense every 30 to 60 days during your active boating season. After any offshore trip in heavy spray, after any period of sitting unused in the water, and at the start and end of hurricane season are all natural checkpoints.
A quick exterior cowling rinse should happen after every trip. It takes two minutes and prevents the salt accumulation that causes long-term fading and corrosion.
If your boat is part of a regular professional detailing schedule, ask specifically about motor maintenance as part of that service. Our full range of boat cleaning and detailing services includes attention to outboard exteriors, and it's worth asking what is and isn't included in any package you're considering. Our post on what's actually included in a boat detailing package walks through exactly those questions.
Common mistakes that cause real damage
A few things to avoid, based on what we see regularly:
- Using WD-40 as a corrosion inhibitor. WD-40 is a water displacer and light lubricant, not a long-term corrosion protectant. It evaporates quickly and leaves surfaces unprotected. Use a product designed for sustained marine use.
- Spraying the air intake with water. The air intake on the cowling draws into the powerhead. Water sprayed here can enter the intake tract and potentially cause hydrolock on a running engine or corrosion internally.
- Cleaning a hot motor. Cold water on a very hot powerhead can cause thermal stress on metal components and may crack or warp parts over time. Let the motor cool.
- Ignoring the motor while obsessing over the hull. We understand the appeal of a gleaming hull. But the metal fittings and electrical systems are where the real corrosion battle is fought in Southwest Florida. Our post on why your boat's metal fittings are corroding so fast in Sarasota's waters explains the chemistry behind why this area is so hard on metals specifically.
A note on warranty documentation
If you're within the warranty period on a newer motor, keep a simple log of your maintenance. Jot down the date, what you cleaned, and what products you used. It takes 30 seconds and gives you documentation that shows reasonable care in the unlikely event of a warranty dispute. Most manufacturers aren't trying to deny valid claims, but showing a maintenance record turns a potential disagreement into a non-issue.
Leaving it to the professionals
There is nothing wrong with doing this yourself, and the steps above are genuinely accessible to any boat owner. But if you'd rather have someone else handle it as part of a regular maintenance routine, professional detailers who work in this area know the specific challenges these conditions create. Whether your boat is kept at a Sarasota Bay marina, on a lift on Longboat Key, or docked in one of the channels around Lido Key, a professional cleaning that includes proper outboard attention is time well spent.
If you have questions about what's right for your specific motor or boat setup, our FAQ page covers many common scenarios, or you're always welcome to get in touch directly for a conversation about what your boat actually needs.
Clean motors run better, last longer, and give dealers far less reason to complicate warranty conversations. In Southwest Florida's climate, that's not a luxury. It's just good seamanship.